Recipe: Mille-Feuille au Rhum (Rum Napoleons)
Level: Intermediate
Techniques: Puff Pastry, Creme Patissiere, Chocolate Glaze
Like so many of the recipes I have attempted on this blog, the history surrounding the mille-feuille is vague. A number of people are credited with its evolution, but the original creator is unknown.
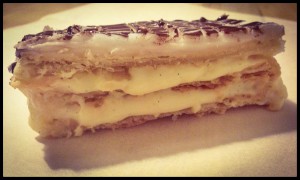
The traditional mille-feuille is a mix of three layers of puff pastry, sandwiched together with (yet more) creme patissiere and topped with fondant icing and chocolate decoration.
The term mille-feuille means a thousand leaves and this is a direct reference to the layers within the puff pastry. The other name; Napoleons, was initially linked to the Italian city of Naples and then became associated with the French Emperor, Napoleon Bonaparte.
For this recipe I needed to make puff pastry. This is something I’ve never made before, skillfully avoiding it when working through the pastry section of the book. On the TV cookery shows they tell you how difficult and time consuming puff pastry is. How good the ready-made stuff is and that there really isn’t any need to make your own.
Now I’m not going to lie to you, this was time consuming. However, it was time consuming in the same way that bread is. It doesn’t need to be watched constantly, just given a little attention every now and again. You could easily make the pastry over a couple of evenings, or throughout your day.
The recipe I used from ‘the book’ made enough pastry for three recipes. So I now have two batches of puff pastry in the freezer. After tasting the cooked pastry, this is something I’m pretty pleased about.
Over the weekend, I purchased a KitchenAid food mixer to help with my baking. This was a big investment and something I’ve wanted for a long time. After just two uses, I don’t regret it for a minute.
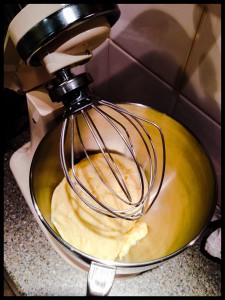
I used it initially to make the puff pastry, binding together the flour, butter, water and a new ingredient (new to me) fleur de sel. The flower of salt (direct translation), is hand harvested sea salt collected by scraping only the top layer of salt before it sinks to the bottom of the salt pans. The salt is light tan in colour and is slightly moist.
After the puff pastry had been given the KitchenAid treatment, it needed to rest in the fridge for 30mins. Then the fun started, the rolling and turning began. The first step involved rolling the pastry out to a square. Then the butter is rolled out into a smaller square and sat on top of the pastry.
The ends of the pastry are folded in like an envelope and the pastry is rolled out in a long rectangle. The pastry is then folded up like a letter, turned 45 degrees clockwise and rolled out again.
Finally the pastry is folded up again like a letter, wrapped in clingfilm and left to rest in the fridge for a minimum of two hours. This is called a ‘turn’ and this step needed to be repeated twice more, at two hourly intervals, so that a total of six folds were completed.

The pastry is then ready to use. I hope you see my point now about how you only need to give this pastry 5 minutes attention every couple of hours. It’s really no more laborious than bread making.
With the pastry ready, I rolled out one third of it and cut it into three strips, 30cm by 13cm. The pastry is laid out on a lined baking tray and sugar is sprinkled on top so that it caramelises when cooking. A sheet of baking parchment is placed on top of the pastry and another baking tray is sat on top of that. This ensures that the pastry does not rise too much when cooking. It’s important that the layers remain flat.
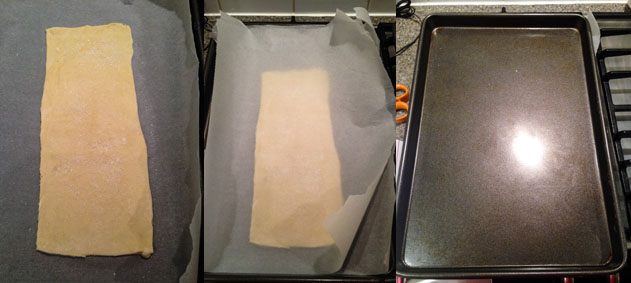
The cooked pastry is left to cool.
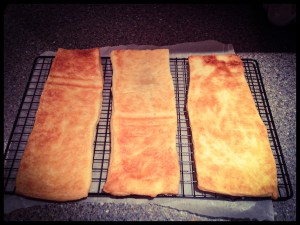
I made the creme patissiere for the filling in advance so that it had plenty of time to cool in the fridge. This was blended with some rum. I used Morgan’s Spiced rum.
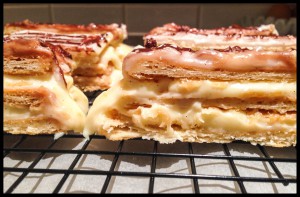
The creme patissiere was piped onto the bottom layer of the pastry, topped with another layer of pastry and more creme patissiere is piped before a final layer of pastry is added.
The last part that remained was the chocolate glaze. By now, this recipe had gone without a hitch. So I was feeling pretty confident. How wrong was I!
To make the topping I had to heat fondant icing with water and then pour it over the top of the pastry. Simple enough.
Fondant icing is a type of ready-roll icing that you can buy in packets. I got mine from Waitrose and thankfully I bought a large packet.
The book was very clear, heat the fondant icing and water to 95F or 35C and then pour it over the top of the pastry.
It all went wrong when the thermometer was set to Celsius and for some reason I thought it was set to Fahrenheit. I heated the fondant icing to what I thought was 95F, which took a really long time and the mixture was becoming like glue.
Only then on closer inspection did I realise I’d heated the fondant icing to 95C, a whole 60 degrees higher than it needed to be. I hoped that the mixture might be OK and sat the pan in a bowl of cold water to try and cool the icing down.
This didn’t really work and so I had to use the remaining fondant icing (which was 100g less than the recipe called for) and start again. The saucepan took a lot of cleaning, so please don’t make this stupid mistake yourself.
This time I heated it to the right temperature and poured it over the pastry. I then melted the dark chocolate and piped it over the shortest length of the cake back and forth. Lastly I dragged a cocktail stick through the icing, trying to create the iconic pattern that this pastry is known for.
I’m not sure if it’s because I didn’t have as much icing as I needed, but the topping set very quickly and the cocktail stick didn’t achieve the delicate pattern I was hoping for.
The other challenge with this recipe was cutting the large cake into individual portions. The book just told me to use a serrated knife. I have no idea how they do this in professional kitchens, but creme patissiere went everywhere and I think it would be much simpler to cut the pastry in advance and make the cakes individually.
This is what I’ll do next time with the pastry I’ve got left over. I will definitely make this again. I know I say it nearly every week, but this has been my favourite recipe by far. I can see that it would be possible to make lots of great variations of this recipe. A coffee icing and hazelnut creme patissiere version would be amazing.
Next week Marronnier and another new product Crème de Marrons.
Thanks for reading.
Angela


Leave a Reply